1. Security & System Access
To maintain strict IT security standards, external partners must follow a specific 2-Factor Authentication (2FA) process. You must complete this setup to access Swarovski DAM.
You may see two different onboarding layouts. Instructions for both layouts are shown below.
LAYOUT 1 - Mandatory 2FA Setup when initially logged in to Cloudinary
If you have followed the login instructions from the welcome email from Cloudinary and are logged into Cloudinary, follow these steps:
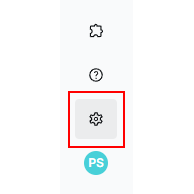
In the lower left corner, click the settings icon.

Click on "Two-Factor Authentication" on top of the screen. Next click on the blue "Set Up Two-Factor Authentication" button.

Check your email and enter the 5-digit code sent by Cloudinary.
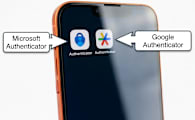
Install one of the supported authenticator apps:

Open the app. In either of the apps click the "PLUS" symbol and select "Scan QR Code".

Scan the QR Code on screen.
Your phone will display a 6-digit code (e.g., 123 456).

Enter the code. Be mindful of time as the code is only active for 30 seconds!

Click Authenticate to finalize the 2FA setup.
LAYOUT 2 - Mandatory 2FA Setup when no longer logged in to Cloudinary and 2FA setup has not been done initially
If you haven't set up the 2 Factor Authentication when you were first logged in Cloudinary, you must complete the 2FA before being able to access Swarovski DAM - Cloudinary Assets again. You will be forwarded to this screen.
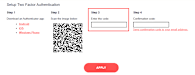
FOLLOW THE INSTRUCTIONS BELOW CLOSELY IN ORDER FOR IT TO WORK!
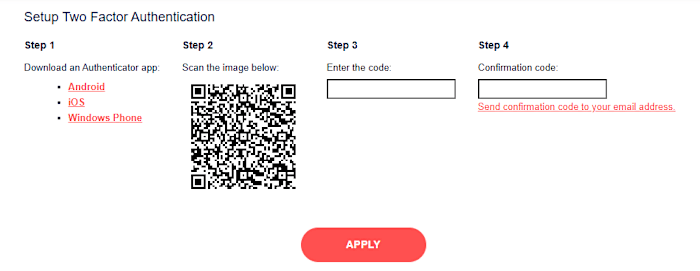
Install one of the supported authenticator apps:
Open the app. In either of the apps click the "PLUS" symbol and select "Scan QR Code".
Your phone will display a 6-digit code (e.g., 123 456).
Enter the code from the Authenticator App.
DON'T PRESS ANY BUTTON YET!
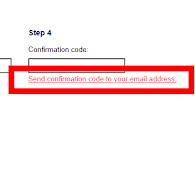
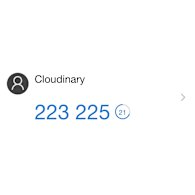
Retrieve the Cloudinary access cide and click "Send confirmation code to your email address".
Don't click any other button yet!
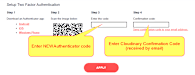
IMPORTANT! FOLLOW THESE FINAL STEPS EXACLTY AS DESCRIBED!
Check the image for details
1. Enter the Cloudinary Confirmation Code received by email into Step 4
2. Open Authenticator App
3. Enter a NEW code from Authenticator App. Be mindful of time as the code is only valid for 30 seconds!
4. Click Apply to finalize set-up